Home
/ Transfer Picture To Wood - Print Transfer To Wood 7 Cool Techniques Explored - Brad gives you a quick rundown on each method, outlining which are best and which are most affordable.
Transfer Picture To Wood - Print Transfer To Wood 7 Cool Techniques Explored - Brad gives you a quick rundown on each method, outlining which are best and which are most affordable.
Transfer Picture To Wood - Print Transfer To Wood 7 Cool Techniques Explored - Brad gives you a quick rundown on each method, outlining which are best and which are most affordable.. I've mostly kept this transfer displayed in my bedroom for the past four years, and it's even moved houses with me once during that time. Place your photo down and flat over the gloss gel, then press the photo down firmly. The ink from the printed image on the card stock seeps into the glue while it is wet. In this simple but brilliant tutorial, adrian salisbury from slr coaching shows you how to easily transfer a photo onto a piece of wood. A diy photo transfer to wood is a rustic alternative to the everyday picture frame.
We've tried several methods in the past, including embedding the image into a latex substrate, and using heat to transfer inks and toner to wood. From there, you can transfer the image to the wood. Lay the tattoo paper, photo side down on top of your wood. As an amazon associate i earn from qualifying purchases.if you purchase something through any link, hello creative family may receive a small commission at no. It's very similar to mod podge and glue method, but instead of glue, a gel medium is used as a transfer medium and mod podge to finish off.
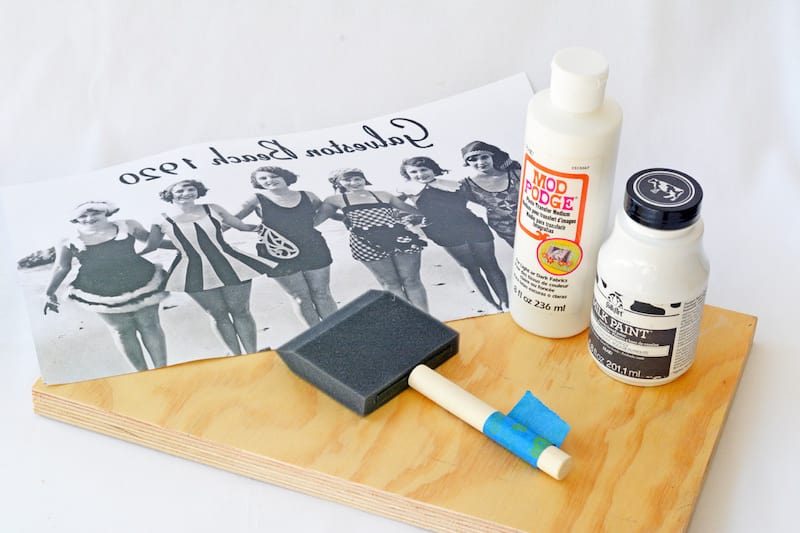
Photo To Wood Transfer In 6 Easy Steps Greywoodmama from images.squarespace-cdn.com Display this diy home decor project on your mantel or attach a wire to the back of it and add it to your wall art. Apply a generous amount of the transfer solution to the image. Adhere your photo/image to the wood with mod podge. Paint a medium layer of mod podge on the wood until it's completely covered. See more ideas about photo transfer, photo transfer to wood, wood transfer. Wood print and diy image transfer are great tools to customize your woodworking projects or to brand your work. Wood photo gif for dad wooden photo on wood photo transfer on wood slice custom photo wooden picture ornaments family photo on wooden base. Mod podging a picture directly onto the wood, and using mod podge to transfer the image onto wood.
In this video i will be showing you the easiest way to transfer an image to wood for pyrography preparation.get my tools 👇wb1 wood burning pen by mm newmanh.
Transfer a picture to wood if you're wondering how to transfer photos to wood, it's a relatively simple process. Avoid moving the transfer on the wood or your work will smudge. Mod podging pictures onto wood is a bit tricky due to the type of paper. Cover the wood slice in a good layer of regular mod podge lay over the photo onto the mod podge and press to get out all the bubbles and wrinkles. Then press the photo down on top of the mod podge, using a credit card or other object to press out any air bubbles. After it dries, you can gloss over it to preserve the image and make the colors pop a. Wood print and diy image transfer are great tools to customize your woodworking projects or to brand your work. Cover the front of your picture with mod podge photo transfer medium. We've tried several methods in the past, including embedding the image into a latex substrate, and using heat to transfer inks and toner to wood. Display this diy home decor project on your mantel or attach a wire to the back of it and add it to your wall art. And then wait 24 hours. Paint a medium layer of mod podge on the wood until it's completely covered. I used my hand and rolling motions using the palm of my hand to ensure good coverage.
It's very similar to mod podge and glue method, but instead of glue, a gel medium is used as a transfer medium and mod podge to finish off. Wood photo gif for dad wooden photo on wood photo transfer on wood slice custom photo wooden picture ornaments family photo on wooden base. Cover the wood slice in a good layer of regular mod podge lay over the photo onto the mod podge and press to get out all the bubbles and wrinkles. Then press the photo down on top of the mod podge, using a credit card or other object to press out any air bubbles. You can put something heavy over to keep it smooth.
How To Transfer Photos To Wood Mod Podge Rocks from modpodgerocksblog.com I used my hand and rolling motions using the palm of my hand to ensure good coverage. There are two ways to do this: Transfer a picture to wood if you're wondering how to transfer photos to wood, it's a relatively simple process. The ink from the printed image on the card stock seeps into the glue while it is wet. Brad gives you a quick rundown on each method, outlining which are best and which are most affordable. 5 out of 5 stars. It's very similar to mod podge and glue method, but instead of glue, a gel medium is used as a transfer medium and mod podge to finish off. And then wait 24 hours.
As an amazon associate i earn from qualifying purchases.if you purchase something through any link, hello creative family may receive a small commission at no.
A diy photo transfer to wood is a rustic alternative to the everyday picture frame. I've mostly kept this transfer displayed in my bedroom for the past four years, and it's even moved houses with me once during that time. It's very similar to mod podge and glue method, but instead of glue, a gel medium is used as a transfer medium and mod podge to finish off. Transfer a picture to wood if you're wondering how to transfer photos to wood, it's a relatively simple process. February 28, 2020 / post may contain affiliate links disclosure policy this post and photos may contain amazon or other affiliate links. Brad gives you a quick rundown on each method, outlining which are best and which are most affordable. But we found an interesting method using epoxy resin which really gives amazing. Use the side of your fist to rub the photo onto the wood to remove any air bubbles and ensure the photo completely transfers. Wood print and diy image transfer are great tools to customize your woodworking projects or to brand your work. We've tried several methods in the past, including embedding the image into a latex substrate, and using heat to transfer inks and toner to wood. Mod podging pictures onto wood is a bit tricky due to the type of paper. Photo to wood transfer tutorial with step by step photos and instructions. Only 1 available and it's in 2 people's carts.
You'll print a photo out on a dry ink printer (like laserjet or an hp). They can look even better on tree slices and slabs of wood. And then wait 24 hours. In this simple but brilliant tutorial, adrian salisbury from slr coaching shows you how to easily transfer a photo onto a piece of wood. Photo transfer to wood using gel medium and mod podge.
How To Transfer Photos Onto Wood Clever Poppy from images.squarespace-cdn.com After it dries, you can gloss over it to preserve the image and make the colors pop a. The ink from the printed image on the card stock seeps into the glue while it is wet. Photo transfer to wood using gel medium and mod podge. I used my hand and rolling motions using the palm of my hand to ensure good coverage. I'll show you 5 different ways to print on w. We want to find the best way to transfer an image from our printer to a piece of wood. Lay a wet cloth on top of the paper backing for 10 seconds or until you can see the image through the backing (see below for example). Not too light and not too thick.
Avoid moving the transfer on the wood or your work will smudge.
From there, you can transfer the image to the wood. I'll show you 5 different ways to print on w. Adhere your photo/image to the wood with mod podge. You can put something heavy over to keep it smooth. A diy photo transfer to wood is a rustic alternative to the everyday picture frame. Your family photos may look nice in their frames, but if you're into rustic decor, take note: Paint the edges of your wood panel. Press the image, photo side down, onto the wood panel. In this simple but brilliant tutorial, adrian salisbury from slr coaching shows you how to easily transfer a photo onto a piece of wood. Rub firmly to smooth out the image and remove air bubbles. Display this diy home decor project on your mantel or attach a wire to the back of it and add it to your wall art. Lay the tattoo paper, photo side down on top of your wood. Cover the front of your picture with mod podge photo transfer medium.